


Painting our Wood Planked Walls, White

Alright… now that the dust has cleared, I wanted to share a few pictures of how the wood planked walls in our Master bathroom are going.


We are fully aware of the fact that this has become probably the longest bathroom remodel in blogland history, but HEY!… that’s life, right!?
One step, and paycheck at a time. ha!
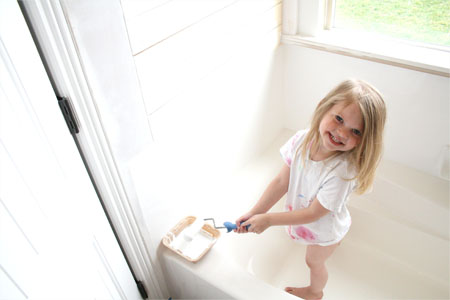
We’ve even recruited help from somewhat unreliable sources, just to get jobs done quicker!
hee hee


Okay… so really, this is what has been going on…
Cason and I filled all nail holes with putty, and then used paintable caulk to fill in the gaps and such around the windows and seams.
Then Cason sanded everything down, and started in on the FIRST coat of primmer.
Yes… I said… FIRST. ha!
It took more then a few coats, to even get a good cover.
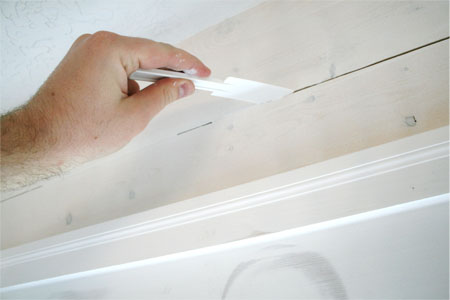
And every time we put a new coat on we had to go through quite the process, of taking this small spatula and making sure that we got all of the excess paint out from in between the boards.
So we could still keep that “uneven character” from the wall, that we wanted.
After most of the paint was out, with the spatula, we went over the open spaces with a paint brush, to make sure we didn’t have any thick spots of paint left, that would dry funny.
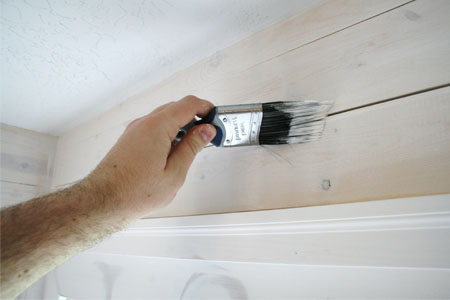
So it looked something like this, after two coats of primer.

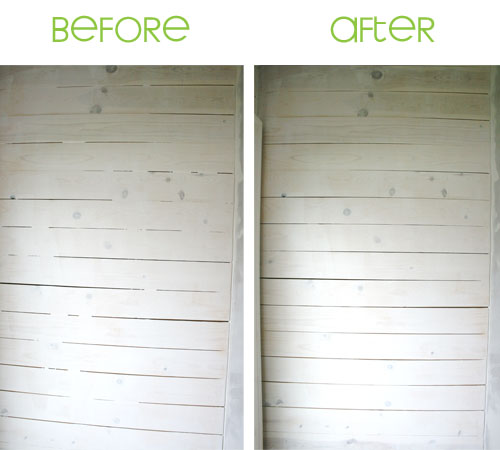
This is a photo of what the wall looked like BEFORE we got all the paint out of the cracks… and after.
Just much nicer, and cleaner. You can tell from the before photo, that if we hadn’t of gotten all the excess paint out, it would have dried as gloppy spots in the cracks.
And this is what it looks like NOW! After about 5 coats of primmer.
🙂
(we still have the actual Semi-Gloss paint to apply)
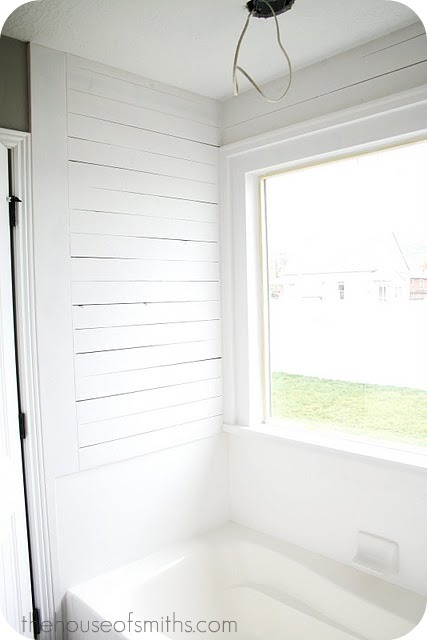
We are LOVING IT!!! It adds so much more character to the space, and REALLY lightens it up!
I can already see the decor in here…..
*sighhhh*
Okay, well, we have a LONG way to go till then, but still, it’s fun to daydream
🙂
…now for that blasted LIGHT wire hanging down!… ugh. (it’s not live, btw)
It’s proving IMPOSSIBLE for me to find the perfect fixture for this space, that doesn’t cost an arm and a leg!

Princess Danell says
Yeah! Have been looking forward to the reveal. Looks great! Go Team Smith!!!
Dara Lynn says
Shelley…it's looks beautiful!!!!! We are doing right in the middle of the bathroom redo too! What a nightmare!!!! Shower leak discovery….oh wait…termites???? O>M>G>!!!! Yes! I have felt the pain in the wallet…2x over …now all the studs are visable…Handsome is sooo proud! What happened to our mini makeover??? lol
Simply LKJ says
Shelley, it looks great! A lot of hard work, but it will pay off big time in the end!! I find lighting hard to find as well, as it usually is quite an investment and you don't want to regret your purchase.
Randi~Dukes and Duchesses says
It really does look amazing – great vision!
Bring Pretty Back says
GREAT choice to paint the wood white! Looks so fresh!! Love it!
Have a pretty day!
Kristin
Unknown says
It's coming along so well!! At first I was digging the plain wood with the sauna vibe, but the white, OH MY. Cottage Chic bathroom! love love love.
You & Cason rock!
Janell @ House of Fifty says
I simply love it!!! It does add so much character, you've got the best projects going on here! Check out my latest venture if you get a chance, houseoffifty.com! Thanks, Janell
Hi I'm Amanda says
Looks great! Can you make over a good will chandiler?? That would look nice and save some pennys =)
Elsa says
I'm so excited to see the end result. It looks SO good, I love it!
Valerie says
Absolutely gorgeous!! Can't wait to see what light fixture you find and love!
Mary says
It looks beyond FABULOUS!!
Just a 'technical' question for you…did you use a shellac-based primer so the knot-holes won't pop out in a few months, or are you wanting them to show through? I kinda like it both ways, just curious how rustic you were going.
Can't wait to see it finished!!
Mary
Unknown says
WOW! Love the transformation…great job! XOXO
Vickie says
Well you officially get a patience award! I don't think my hubby would even let me attempt this. He is an "instant grat." kind of guy. If I even utter the word "shabby chic" he shivers, definitely not his cup of tea. I love the look and can't wait to see how you finish it out.
Karri says
Wow – its going to be gorgeous!
heather {WhipperBerry} says
my dear can I just buy your house when you are done. I want to live in such beauty!!
kisses
heather
Reenie says
Look for chandeliers on craigslist, or DAV, Goodwill (whatever you have there), garage sales, etc. I found one for my niece at a garage sale for .25 cents!!! WOOT!!! Yes, it's brassy and ugly….but with a lil spray paint and some crystals to hang from it ~ it will look fab.
Looks great ~ can't wait to see it all finished. 🙂
Stephanie says
ooh, I can not wait to see it finished! It is awesome already!
Unknown says
I LOVE the look so far! Cant wait to see the fabulousness when it is all done.
My bathtub area looks just like this with the big window and right behind the door. Hmmm… wonder if I could talk my hubby into doing this 🙂
SheilaG @ Plum Doodles says
It looks so good! In our area, codes don't allow electrical over the tub, so I looked for a candle chandelier (candelier?). Finally found one at Kirkland's- check them out, you might love it! 🙂
House of Smiths says
Thanks everyone!
Ya, Lizzy, codes don't REALLY allow for anything hanging over the tub. Just a can light.
But we NEVER use our tub, because we just aren't "tub people" and so I think I'll just put something decorative there, for the time being, more as "light decor" and for extra brightness at night.
I'm sure if we ever sell our house, we'll just pop a can light in the hole, and call it good, so we can pass inspection. ha!
The Beach Lady says
Lovin' what you, your hubby and your little helpers 😉 have accomplished in this bathroom redo! The painted plank walls are fabulous. I may just have to find a way to try this in my current bathroom remodeling project. Thank you for the inspiration and whatever you find for lighting, I just know it'll be sweet!
Vickie
To The Moon and Back says
A-Mazing! Can't wait to see it with all your great finishing touches:)
Elisabeth says
I am loving your plank walls. It reminds me of the Lettered Cottage style, which I love. So, I wanted to suggest a light fixture to you that I have and love. You can see it in a photo in this blog post of mine:
lambie-pie.blogspot.com/2011/04/entryway-before-and-after.html
It is a mini vintage schoolhouse looking light. We bought it at Lowe's, and in fact I have two, another one in my upstairs hall. I LOVE this light, it's my fave in my whole house, and it was only $40 at Lowe's. It may work for you in your space since it's kind of small. Anyway, I don't know if that's what you're going for but thought I'd let you know. I first saw it on the blog Canadian Cottage- one of my all time faves. They used it in their kitchen and mentioned it was from Lowes so I was happy they still carried them. I may go buy one or two more just so in case we move I can have one for the new place, that's how much I love it!!!
Home by Heidi says
Looks amazing!! When chandelier shopping I have had a lot of luck on overstock.com GOOD LUCK!!
Sander And A Prayer says
I'm so glad I found this! We're restoring our plank walls! We just bought a 100 year old home. I just finished taking down 70s paneling and wallpaper over muslin. It's quite the job and we haven't even gotten to the painting! It's all been great though!
Sander And A Prayer says
I can't tell if my last post posted. But we're restoring our plank walls! We have a 100 year old home. I just took down 70s paneling and wallpaper over muslin and I haven't even gotten to the painting yet. Thank you for sharing. I'm so happy to find this and our names are spelled the same!
Kristy says
What kind of wood did you use?
Kristy says
What kind of wood did you use?
Kristy says
What kind of wood did you use?