


DIY Custom Office Shelving
It’s time for another “A Blogger’s Office Makeover” post! yahoo!
If you’ve missed our past office project posts, you can read about them below:
If you’ve missed our past office project posts, you can read about them below:


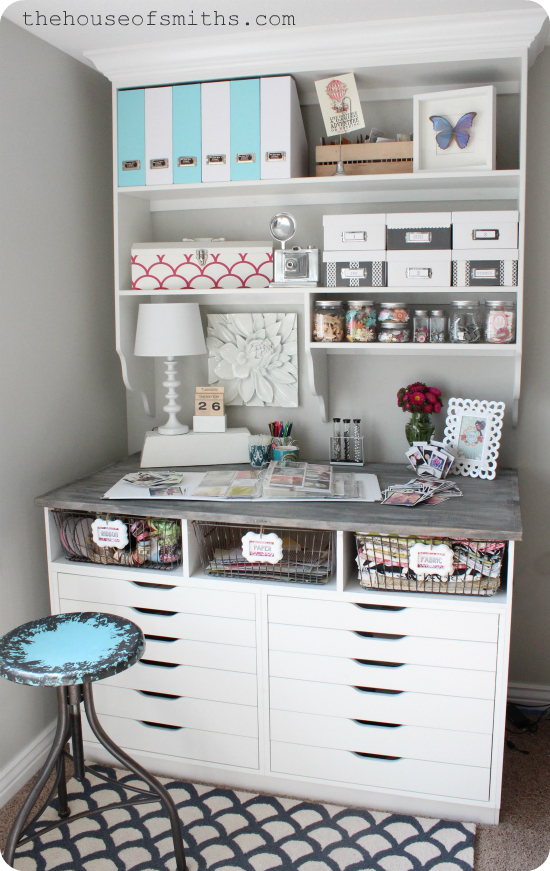
One of my favorite additions to this space has been the custom work table with the Faux barn wood painted top that my Dad help me build. It’s been SO awesome to work on when I’m wrapping presents, crafting up a cute card for someone or putting together my Insta-Life album.
Because I have way too much a lot of creative supplies and other papers to keep organized in this office, I knew I needed shelving storage along with the storage that my new drawers below gave me. I looked around, trying to find shelves that were functional, cute and would fit my space perfectly, but came up short. So, in true DIY fashion… we built some!
🙂 

🙂
First we had to come up with a plan.
I knew that I wanted shelves on my wall that looked more like a built-in than just free standing fixtures, so with a little designing on my part, some sketching and lots of building know-how from my Dad, we came up with this final plan.
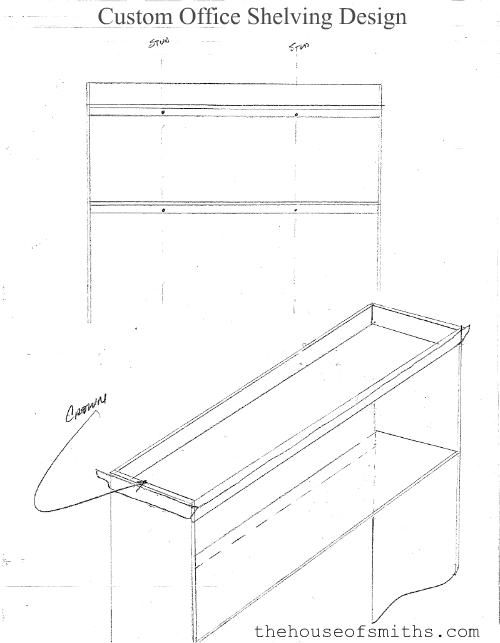
We used 12 inch pieces of primed MDF wood for most of the fixture, routered out the design on the bottom and made some slats for the shelves to nestle into.
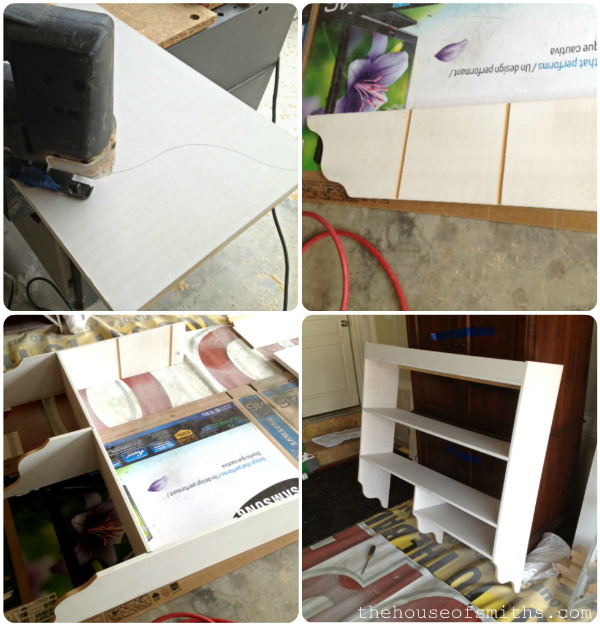
After the fixture was built, Cason painted the entire piece with semi-gloss bright white, and helped my Dad figure out the right height for it to mount to the wall. We used some ScotchBlue Painter’s Tape to mark our spots and then screwed a scrap 2×4 piece of wood to the wall and made sure it was level, so that it could act as help to support the shelf when we set it up.
(this prevented the shelf from moving around as well, while we were placing the screws to secure the heavy shelf to the wall)
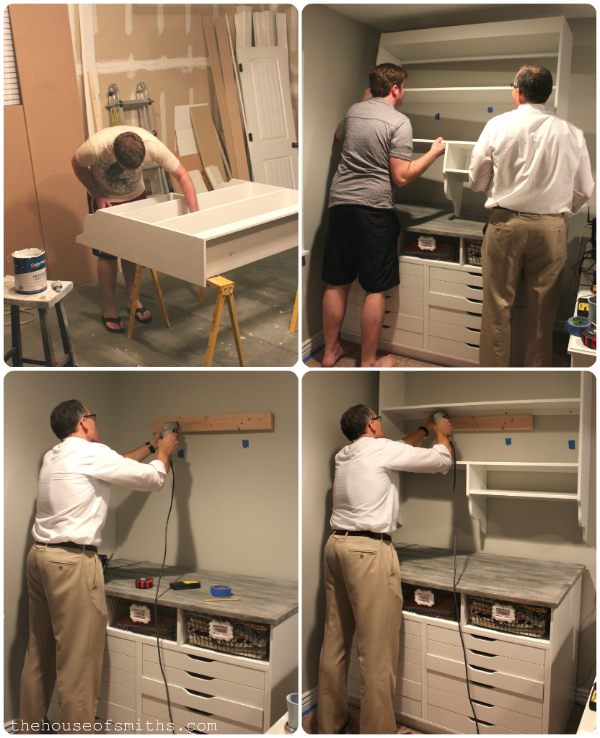
After the shelf was secure, the support wood came down, and we were in business!

Here’s a short little video of how we finished off the shelf, so you can get a better idea of how things all came together.
Basically, since we wanted the “built-in” look, we decided to cap the top of the shelving unit off with some chunky crown molding. Cason marked the angles with a protractor and taped off the section he was cutting with some ScotchBlue painters tape, to make sure he had the smoothest finishing cuts possible.
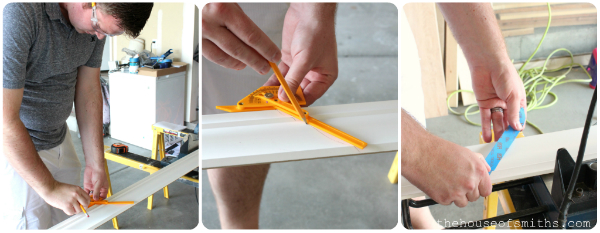
Remember at this point too, whenever you’re working with power tools, to protect yourself to avoid injury. Cason wore some 3M TEKK Protection ear plugs (because cutting with a saw in the garage can be especially loud) and also protective glasses, to keep small pieces of wood or sawdust from getting in his eyes. The tinted ones pictured below are great if you’re cutting in direct sunlight outside.


Something else to keep in mind, that we didn’t mention in the video, is that when you’re doing a large amount of sanding, like before you paint the entire fixture for example, make sure to sand in a well ventilated area, and if needs be, wear a protective face mask. MDF material is easy to work with and shape, because it’s a lot softer then regular hard wood, but it sends off a lot of floating dust too, that isn’t so great for breathing in.
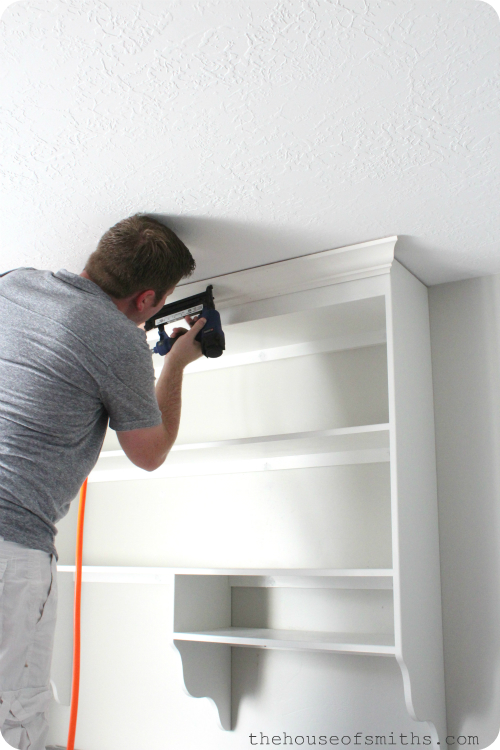
Using a nail gun with finishing nails, he attached the crown molding to the top of the shelving unit.
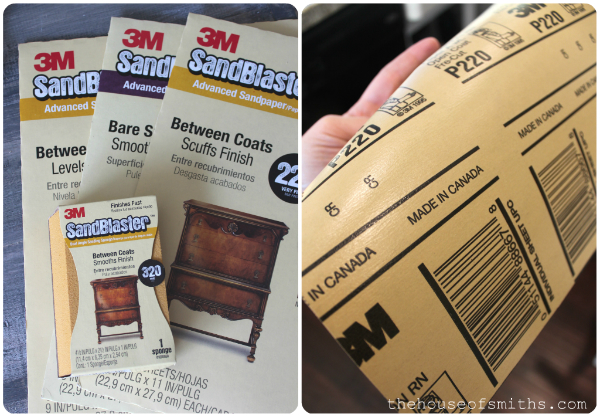
And then I went in with this patch plus primer that 3MDIY.com sent us, and filled in the screw and nail holes and let them dry. This was a seriously AWESOME product. I loved the finished texture (which is way more paint-friendly than some other spackle), and it dries lickity-split! 🙂

Once dry, I used some of the 3M Advanced Abrasives to sand off all the extra leftover spackle, so I had a really smooth finish before touching up the paint where the screw holes were.
I talk a little about this in our video, but 3M has now added a no-slip grip backing to their sandpaper that I’m pretty much obsessed with. It’s so smart, and definitely makes a big difference, especially when you’re sanding bigger projects.
With just a little bit more paint, a bunch of organizing and some fun staging… my custom office shelving unit is finally done! Yay! I’m seriously thrilled with this project, and really glad that we decided to design and build the shelf ourselves, instead of trying to buy one. The look is exactly what I was going for and my storage boxes fit perfectly in the space.
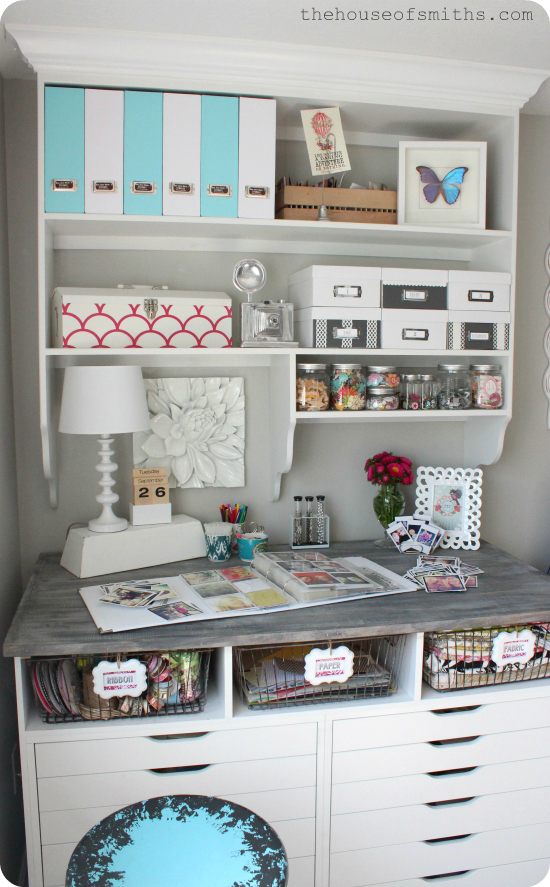
Side Note: I’ll be breaking down all of the little details from a decorating standpoint in a post coming up soon.
🙂
. . . . . . . . . . . . . . . . . . . . . . . . . . .
You can visit 3MDIY.com, 3M DIY on Facebook, and 3M DIY on Twitter to stay updated on cool new 3M products and to see other fantastic projects by fellow bloggers! You can also check out 3M DIY on YouTube to view lots of helpful DIY tips.


This post is a collaboration with 3MDIY.com. To enter to win free samples for your next DIY project, visit 3MDIY.com. Some content and samples were provided for this project.


Sausha @ Sweet Pickins says
Ok Shelley – your patching holes with pretty painted nails and some cute bracelets, your dad is clearly not in his "DIY work clothes" – you guys are really stepping it up for your pics!! 😉 your built in looks awesome and you have totally inspired me to organize my craftroom a little so i can finally post about it! Talk to ya later 🙂
Dannyelle @ www.lifeisaparty.ca says
Love it, I so wish I had a blogging office like yours. Guess I'll stick with the dinning room table for now and dream of an office as cute as yours someday. 😉
Dannyelle
Bethany says
Beautiful! You have an incredible gift.
Bekah says
Looks great!!
Unknown says
FREAKING gorg. ALL OF IT! WELL DONE TO BOTH of you. All the decor pieces and the way you stylized and organized it is SLAM DUNK GIRL! hugs, jen
KIM {POPPY SEED PROJECTS} says
So cute! Love the crown at the top – good job you guys :).
Celebrating Moments by Marcie says
LOVE IT!!!!
mariepier says
Everything you do is so stylish and beautiful!! You are amazing!!
Angela says
I love it!! I can't wait for the next post because I am in love with those wire baskets….what a great way to store ribbon!!
The {Prince} Family says
I want that chair. Love the whole tutorial Shelly. That office has so many neat details to it. Great job!
Posh Ideas says
So fun I love this little built in! What a great space!
Jennifer@ClassicStyleHome says
I am so impressed! It looks wonderful! The gray countertop gives it a little special. What's also nice is you customize it to your storage needs.
Lori says
Love it! It's perfect for your space and all the shelves and compartments hold everything you need! When are you coming over to build one for me? 🙂
The Carnahan Family says
Love elevated shelves for storage. thank you for the idea. We're about to start a huge renovation in a new house, so I'll be saving this one for later!!! Thank you!
Natalie says
It looks AMAZING as always!
Geoff and Jill says
Yes I love that rug with the scallops on it!!! Looking forward to your decorating post!
Liza says
Great space. LOVE THE RUG! Would you mind sharing where it is from.
Ang says
I can't wait to hear about the decor. Looks great!
Ang says
I can't wait to hear about the decor. It looks great!
Kimberly says
I *just* finished painting my craft/study room this evening – great minds think alike 😉 I was just looking at my shelving unit and thinking "hmmm…this needs crown.." to finish it off, then I spy what you wonderful DIY'ers have been up to and yup, now I'm certain a trip to Lowe's is happening.. Thanks for the inspiration, and it looks fabulous – I can't wait to see how everything all works together in your beautiful office!
Kym says
It looks so pretty. i was so excited to see that this post was up! i love seeing your reveals.
Nicole Shah says
Looks awesome Shelley! Thanks for sharing.
Nicole Shah says
Looks amazing Shelley! Thanks for sharing.
To The Moon and Back says
Of course this looks AMAZING and beautiful! I need, oh who am I kidding, WANT a space like that. So, do Cason and your Dad offer weekend classes? I have someone I'd like to sign-up!
Unknown says
This is so incredibly cute!!! You could make a bunch of these shelves, sell them and get rich.
I get so tickled when I see you talk about all the 3M products you love. I'm always tempted to show your posts to my bosses, they would love the product plugs. LOL.
As of April I work for 3M so kinda weird knowing everything with 3M in bright red comes from somewhere in my company. LOL.
I love this Shelley. When is Cason and Dad coming to build some in my house… Of course the obligatory and mandatory decorating job by Shelley Smith is required. ☺
Anonymous says
Wow that looks great!
House of Smiths says
Hey… ain't nothin' wrong with the dining room table… that was my office for the first year or so 🙂
House of Smiths says
The rug is from Home Fabrics. We got it there a few years ago, but rugsusa.com has a LOT of beautiful options too, and they usually have a coupon that you can find online 🙂
House of Smiths says
Yes! You should do the crown 🙂 It makes a ton of difference!
Decor Addicts says
I totally love it. Thank you for the DIY.
Anonymous says
Looks AWESOME!!!!!! Wow, i just love it. And your See Jane Work items just POP against the white. So pretty!!! Question (or maybe i missed it in the video), how did you fill that teeny tiny gap b/t the crown molding and the ceiling? GREAT job, as usual!!
ds says
Question for Cason—- did you center the blue painter's tape on your 45 degree angle or did you put it next to the line to cut
ASPenner says
This looks great!! Goo djob!
Anonymous says
This is beautiful. Thank you for being so inspiring 🙂 I LOVE the white flower artwork….Is that DIY or did you buy it? Where? If you did purchase it PLEASE 🙂
Danielle Ramirez
ds says
This comment has been removed by the author.
ds says
I have a question for Cason—when you put the blue painter's tape on the angle to cut for the crown molding, did you cut on the side of the tape or through the middle to cut down on "snags"? The hutch looks wonderful.
House of Smiths says
I actually bought it at ZGallerie! 🙂
House of Smiths says
hi!
He put's it right along the edge of the pencil mark. almost so it cuts it… right up to the edge.
Anonymous says
Hadn't seen the patch plus primer before – Genius! BTW last time I was at the ENT I learned that the fumes from all the refinishing I've done aren't as harmful as the particles from sanding. Moral of the story is unless you don't want to smell (or taste) your food by the time you're 50 wear a mask and open the windows like you suggested. Love your space, especially the curved sides on the shelves!
ds says
Thanks so much, that really helps.
Julie says
This looks fantastic! Such a good built in space!
Anonymous says
Oh my !!! You've so inspired me to do something with my little space !!! I love what you did 🙂
Melissa says
AWESOME. AWESOME. AWESOME.
Anonymous says
What color did you paint the walls? Love it
House of Smiths says
The wall color is Repose Gray by Sherwin Williams 🙂
Garage Storage Shelving says
Those shelves turned out quite fantastic. It really looks professionally done.
Unknown says
Can I ask where the wire metal storage baskets came from? Everything looks great!!